Megabonk has dozens of items, and they will greatly influence how far players will make it in a run. Some items are available from the start, but others will only become available once players complete certain quests.
There are five item rarities in Megabonk, and while high-rarity items are much harder to find and are generally considered to be more powerful, they aren't always the most useful. This guide features a selection of useful items that players will want with them during any run, regardless of rarity.
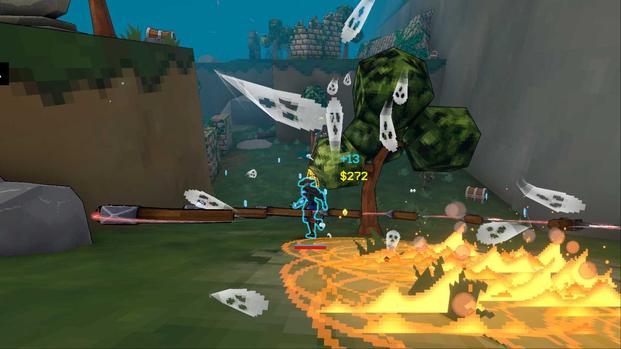
Ghost
- Rarity: Common
- How to unlock: Survive the Final Swarm for 60 seconds
- What it does: Using an interactable summons ghosts
It's easy to overlook the usefulness of common items, as they will regularly appear in chests and when interacting with a Moai Statue. However, that doesn't mean they can't be just as helpful in a run as legendary items.
When players add the Ghost item to their inventory, they will summon ghosts whenever they use an interactable, such as pots, Shrine of Succ, Curse Shrine, Greed Shrine, Moai Statue, tumbleweeds, and chests. These interactables are scattered all over the map, and if players tend to explore as much as they can, they will be able to accumulate a significant number of Ghosts, which can easily take down hordes of monsters and bulky bosses.
This item works particularly well with fast characters, such as Tony McZoom and Calcium, as they're able to quickly move around the map and reach a higher number of interactables in a short time.
Credit Card

- Rarity: Uncommon
- How to unlock: N/A - Starting item
- What it does: Increase Damage by +2.5 percent when opening a chest
In Megabonk, players need gold in order to open chests. The first chest only costs 30 gold, but the price will increase significantly as they open more of them. Therefore, as players survive longer, it will be harder to get enough gold and keep opening chests. However, in the early game, they will be doing it pretty often.
The Credit Card item increases players' Damage stat by +2.5 percent each time they open a chest. If they're lucky enough to get the Credit Card item before chest prices become unreasonable, they will benefit from this item a great deal and it will be a main source of Damage in their run.
Campfire

- Rarity: Uncommon
- How to unlock: N/A - Starting item
- What it does: Standing still heals you
The Campfire isn't as exciting as some items because it doesn't change player stats or grant them special abilities. It simply heals them by standing still. However, this can help players survive through the first stage of a run, while they're still gathering enough XP to make their ideal build.
With one Campfire, players will only heal +1 by standing still, but it is at such a fast pace that they will completely replenish their HP within seconds, and that is why it is such a valuable item in Megabonk. Players can increase the number of Campfires in their inventory throughout their run and, eventually, not even have to worry about their HP regen stat.
Ultimately, players shouldn't dismiss the Campfire because it doesn't add to their Damage output. It can be just as helpful in terms of survival. However, they must keep an eye out while standing still, as some enemies, such as the Cactus and the mini and Stage bosses, have ranged attacks that will easily connect with a still target.
Sucky Magnet

- Rarity: Legendary
- How to unlock: Complete every single Charge Shrine on one map
- What it does: Periodically drag in all XP around you
The Sucky Magnet is a legendary rarity item, so gamers won't cross paths with it as often as they might like. However, if they are able to acquire it, they will be able to freely explore the map without having to backtrack as often to grab XP shards.
Shrines of Succ can be found on the map, and Magnet powerups will occasionally drop. However, this requires some luck. The Sucky Magnet guarantees that players will be able to collect all XP shards dropped on the map every now and then.
This is particularly valuable once the final swarm comes in. If players don't want to get too far from the portal but are still trying to farm final swarm XP before moving onto the next stage, they can hang near the portal's entrance and wait for the Sucky Magnet to activate before they go in.
Bob (Dead)

- Rarity: Rare
- How to unlock: Survive the final swarm for 2 minutes
- What it does: For every 14 units moved, summon Bob (he's dead)
As mentioned before, ghosts are a great way to passively damage enemies, and Bob is no different. With the Bob (Dead) item, players will summon ghosts for every 14 units that they move. This item paired with a speedy character or one with a leveled up Agility Tome can be quite a powerful combination.
Since item selection in Megabonk depend on RNG, it's not possible to guarantee that Bob (Dead) will appear among the player's item chose during a run. However, if it does happen, it is the type of item that may influence players' other choices. For example, if they're trying to complete the Pacifist Challenge, getting Bob (Dead) is reason enough to pick the Agility Tome over everything, as it will make the challenge much easier. Even if players don't bet on the agility stat during their run, Bob (Dead) will continue to passively damage enemies, which is always helpful.
Read the full article on GameRant
This article originally appeared on GameRant and is republished here with permission.